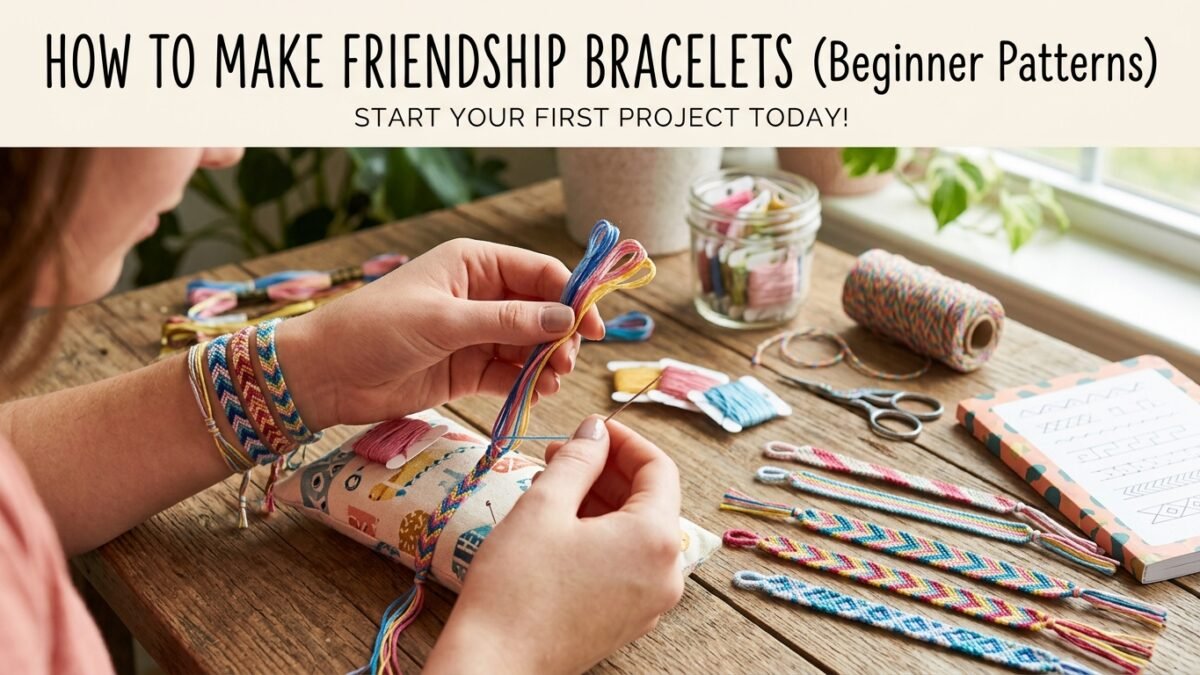
Friendship bracelets are having a full-blown revival — here’s everything you need to make your first one, no experience required.
🕐 8 min read
Disclosure: This post contains affiliate links. I may earn a small commission if you purchase through my links, at no extra cost to you.
Friendship bracelets are back and they’re still one of the easiest crafts to make with kids, tweens, and teens. They’re inexpensive, portable, and require only a few basic supplies.
They’re also a great activity for sleepovers, birthday parties, summer afternoons, or simply keeping kids busy without turning your kitchen table into a disaster zone.
If you’ve never made a friendship bracelet before, don’t worry. The classic diagonal stripe bracelet looks complicated, but the basic technique is surprisingly simple: one knot repeated over and over.
In this guide, you’ll learn how to make a classic friendship bracelet, what supplies you need, and several easy patterns to try once you’ve mastered the basics.
What You Need to Make a Friendship Bracelet
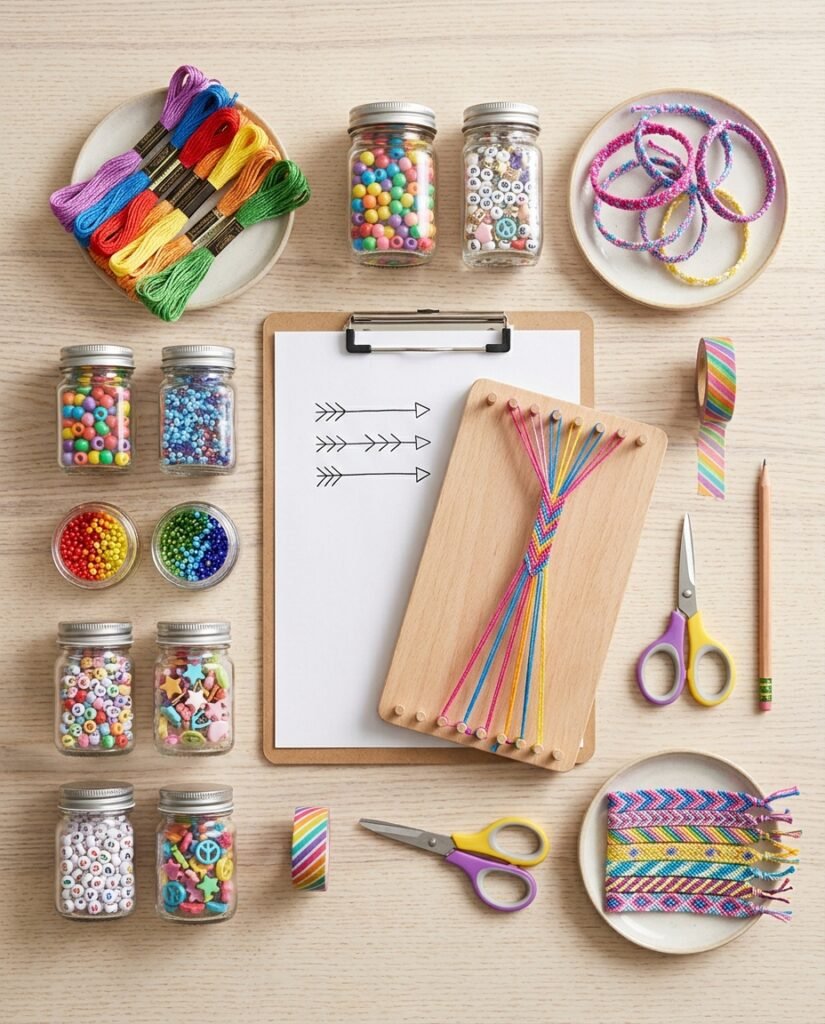
You don’t need a huge collection of craft supplies to get started. A few inexpensive basics are enough for your first bracelet.
1. Embroidery Floss
Embroidery floss is the classic material for knotted friendship bracelets. It comes in dozens of colors, so you can create simple two-color bracelets or much more colorful designs.
If you’re making several bracelets, a multi-color pack is usually more practical than buying individual skeins.
Tip: Choose colors with plenty of contrast for your first bracelet. It’s much easier to see your pattern while you’re learning.
2. A Bracelet Board, Clipboard, or Tape
Keeping the strings secure makes friendship bracelets much easier to make.
A dedicated bracelet-making board is convenient, but you don’t have to buy one. A clipboard or a piece of tape holding the strings to a table works too.
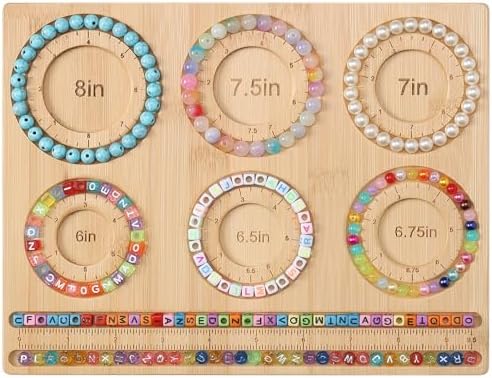
- ☘️【Multifunctional Beading Board】The beading board bracelet for making includes 6 grooves specifically designed for maki…
- ☘️【Easy to Use】Each package contains a bead board for jewelry making, shown beads and tools are not included. Our bamboo…
- ☘️【Made of Natural Bamboo】The bead design board is made of high-quality natural bamboo, not easy to break and deform. Th…
3. Small Scissors
You’ll need scissors to cut your embroidery floss and trim the ends when you’re finished.
Small craft scissors are especially handy because they’re easier to control when you’re working with thin thread.

- ARTS AND CRAFTS STAPLE: Fiskars SoftGrip Titanium Scissors for cutting a wide variety of materials including paper, card…
- PRECISION ART SUPPLIES: Stainless steel blades feature titanium blade coating that is 3x harder than steel and offers a …
- LONG LASTING AND RELIABLE: A dependable addition to your office supplies and scrapbook supplies; Fiskars craft supplies …

- 2.5mm Premium Thick Blades for Heavy Duty Cutting – These scissors feature 2.5mm thick stainless steel blades, is thicke…
- Comfort-Grip & Left/Right Handed – Soft rubber handles with ergonomic shape reduce hand fatigue during long crafting ses…
- Must-Have for Office, School & Classroom Supplies – Whether you need to cut paper, cardboard, wrapping paper, photos, co…
4. Beads and Charms
These are optional, but they’re an easy way to make a basic bracelet more personal.
Try:
- Pony beads
- Seed beads
- Alphabet beads
- Heart charms
- Initial charms
- Colorful decorative beads
Beaded bracelets can also be a good option for younger children who aren’t ready to learn the knotting technique.

- 【Package Includes】100Grams assorted beads bulk, about 120-160pcs, Dark Colorful colors, random mixed packaged in a box, …
- 【Diverse Shapes】The retro pretty beads come in a variety of shapes, including round, oval, teardrop, barrel, heart, butt…
- 【Unique Design】Drawing inspiration from the Czech style, these novelty beads skillfully blend the essence of traditional…
5. Optional Bracelet Closures
The traditional friendship bracelet is finished by tying the ends around the wrist, but you can also use bracelet clasps or other closures if you prefer a more polished finish.

- Sufficient Quantity: The lobster claw clasps set includes a total of 270pcs lobster clasps and jump rings, which is plen…
- Various Colors: Jump rings include 8mm and 6 colors, lobster clasps are 12mm and 6 colors, which are the most popular si…
- Wide Application: The lobster claw clasps set for a variety of craft projects, these open jump rings are not only for je…
The Basic Friendship Bracelet Knot
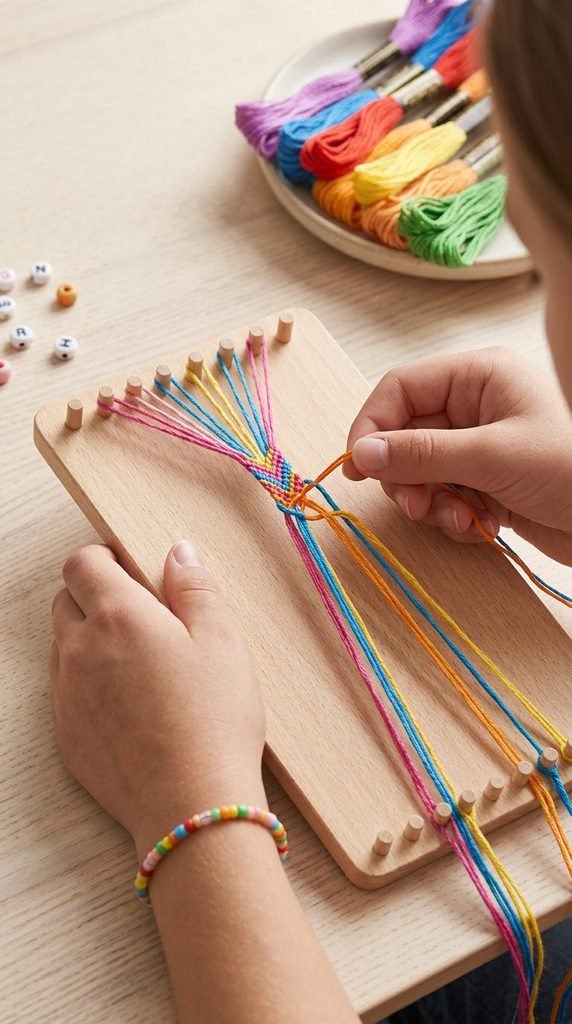
Most beginner friendship bracelet patterns are built from a small number of basic knots.
For the classic diagonal stripe pattern, you’ll use the forward knot.
Here’s how it works:
- Take the string on the far left and place it over the string next to it, forming a shape similar to the number 4.
- Bring the working string underneath the second string and through the opening.
- Pull the working string upward to tighten the knot.
- Repeat the knot on the next string.
- Continue across the row until the working string reaches the far right.
The important part is to keep your tension fairly consistent. Pulling some knots much tighter than others can make the bracelet look uneven.
How to Make a Classic Diagonal Stripe Friendship Bracelet
The diagonal stripe, sometimes called the candy-stripe bracelet, is one of the best patterns for beginners.
Step 1: Cut Your Thread
Choose 4–6 colors of embroidery floss.
Cut each piece approximately 24 inches long to start. If you have larger wrists or tend to use a lot of thread while knotting, cut your pieces longer.
It’s better to have extra thread than to discover halfway through the bracelet that you don’t have enough.
Step 2: Arrange Your Colors
Place your threads in the order you’d like them to appear.
For example:
- Pink
- White
- Purple
- Blue
- Yellow
Line up the ends evenly.
Step 3: Secure the Threads
Tie a knot near one end, leaving several inches of loose thread for finishing.
Then secure the knotted end using tape, a clipboard, or a bracelet board.
You want the threads to stay in place while you work.
Step 4: Start With the Leftmost Thread
Take the thread on the far left.
This is your working thread.
Make two forward knots around the thread immediately to its right.
Then continue making two forward knots around each thread as you move toward the right.
Step 5: Move Across the Row
Once the original working thread reaches the far right, leave it there.
The thread that is now on the far left becomes your new working thread.
Repeat the same process.
Step 6: Watch the Pattern Develop
After several rows, you’ll start to see diagonal stripes forming.
Don’t worry if the first few rows don’t look perfect. The pattern becomes much easier to recognize as you continue.
Step 7: Finish the Bracelet
Once the bracelet is long enough to fit comfortably around the wrist, tie off the end.
You can leave the loose threads as traditional ties or finish them with a different closure if you prefer.
6 Easy Friendship Bracelet Patterns to Try
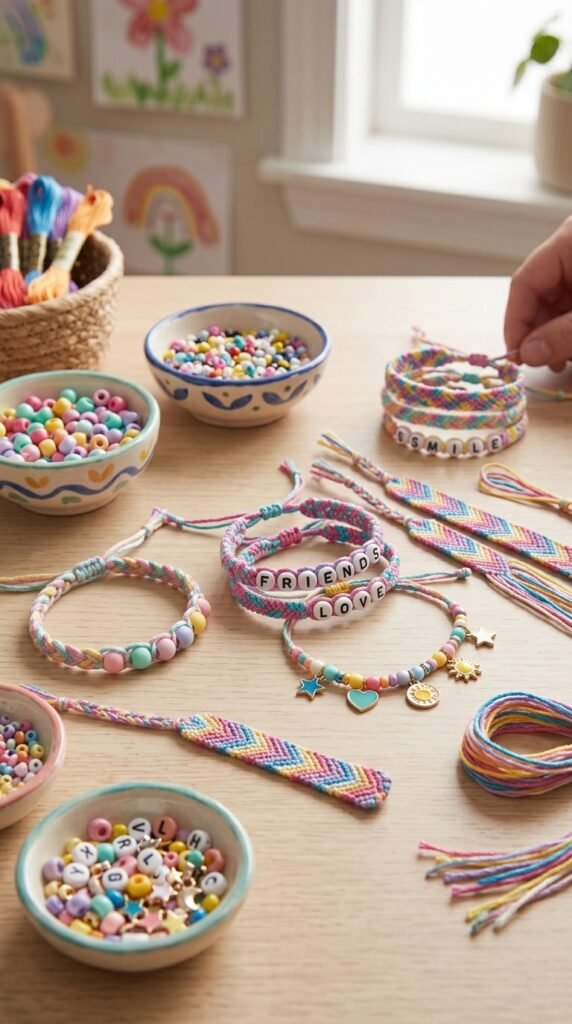
Once you’ve made a few diagonal bracelets, you can experiment with other designs.
1. Diagonal Stripe
Difficulty: Beginner
This is the classic friendship bracelet pattern and one of the easiest places to start.
It uses the same basic forward knot throughout the bracelet.
2. Chevron Bracelet
Difficulty: Beginner to intermediate
The chevron creates a V-shaped pattern by working from both sides toward the center.
It looks much more complicated than it actually is once you’ve learned the basic knots.
3. Straight Stripe Bracelet
Difficulty: Beginner
Straight horizontal or color-blocked stripes are another forgiving option.
They’re especially useful when you’re learning how to maintain consistent tension.
4. Beaded Friendship Bracelet
Difficulty: Beginner
Add pony beads, seed beads, or alphabet beads to a simple braid or cord.
This is a great option for children who want to make something quickly without learning several knotting techniques.
5. Alphabet Bracelet
Difficulty: Beginner
Use letter beads to spell:
- A name
- A nickname
- A favorite word
- A short phrase
- Initials
These also work well as personalized party favors.
6. Friendship Bracelet With Charms
Difficulty: Beginner
Start with a basic bracelet and add a small charm in the center.
A heart, star, flower, initial, or favorite symbol can make a simple bracelet feel much more personal.
Friendship Bracelet Ideas for Kids’ Parties and Sleepovers
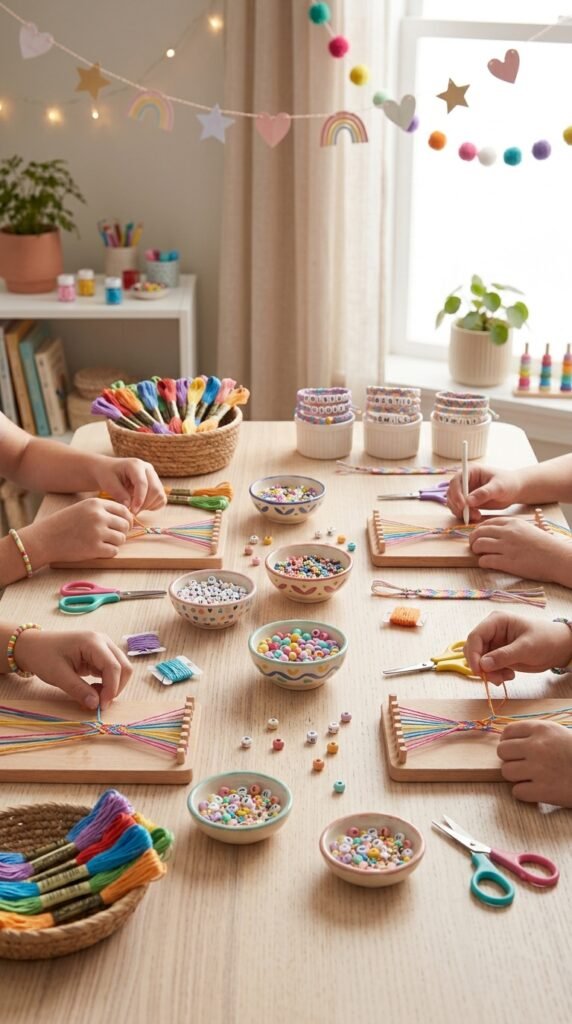
Friendship bracelets are especially useful when you’re looking for an activity that doesn’t require a lot of cleanup.
For a party, prepare the materials ahead of time.
Create small bundles containing:
- Pre-cut embroidery floss
- A few beads
- A charm
- A small instruction card
You can place each bundle in a small cup, bag, or container so children can choose their colors and get started.
For younger children, consider using beads and elastic cord instead of knotted embroidery floss.
For older kids and tweens, you can provide several colors of floss and let them choose their own patterns.
Planning a Friendship Bracelet Party?
If you’re making bracelets with a group, buying supplies individually can become expensive and disorganized.
Look for multi-packs of embroidery floss, larger bead assortments, bracelet-making kits, and small organizers that can keep everything together.
That can make setup much easier when you’re preparing bracelets for a birthday party, sleepover, camp activity, or classroom craft.
How to Make Friendship Bracelets Easier for Beginners
Use contrasting colors
Dark purple and blue can be difficult to distinguish while you’re learning. Try combinations such as pink and white, yellow and purple, or blue and orange.
Keep your strings organized
If your threads keep crossing over each other, stop and straighten them before continuing.
A bracelet board or clipboard can make this much easier.
Keep your tension consistent
Your knots don’t need to be extremely tight.
Try to use approximately the same amount of tension for each knot so your rows stay even.
Make your first bracelet simple
It’s tempting to start with a complicated pattern because it looks pretty.
Resist that temptation.
A basic diagonal stripe will teach you the technique you need for many other patterns.
Don’t throw away imperfect bracelets
Your first bracelet may not look perfect—and that’s okay.
Keep it.
You’ll be surprised how much better your second or third bracelet looks once your hands get used to the motion.
How Long Does It Take to Make a Friendship Bracelet?
A simple bracelet can take approximately 20–40 minutes once you’re comfortable with the technique.
First-time makers may need longer because they’re learning how to position the threads and maintain consistent tension.
Beaded bracelets can be considerably faster, which makes them a good choice for parties where children need to finish their projects within a limited amount of time.
What Age Can Kids Start Making Friendship Bracelets?
The right age depends on the child’s patience and fine-motor skills.
Around ages 5–7:
Simple beaded bracelets using larger beads and elastic cord may be easier.
Around ages 8–10:
Many children can begin learning basic knotting with embroidery floss.
Tweens and teens:
More detailed patterns, alphabet bracelets, charms, and personalized designs can make the activity more interesting.
Always supervise younger children when using small beads, scissors, or other small craft components.
Frequently Asked Questions
What is the easiest friendship bracelet pattern?
The diagonal stripe or candy-stripe pattern is one of the easiest knotted patterns for beginners because it uses the same basic forward knot repeatedly.
How much embroidery floss do I need for a friendship bracelet?
For a basic bracelet, starting with pieces around 24 inches long is a reasonable starting point. You may want to cut them longer if you’re making a wider bracelet or are new to knotting.
Can I make a friendship bracelet without a bracelet board?
Yes. Tape, a clipboard, or another method of securing your threads can work. A bracelet board is simply a convenient way to keep the threads organized and under tension.
What are the best beads for kids’ friendship bracelets?
Pony beads and larger alphabet beads are easy options for many children’s projects. Smaller beads can be used for more detailed designs, but they require more patience and closer supervision.
Can I make friendship bracelets for a party?
Absolutely. Friendship bracelets are a good party activity because they’re portable, relatively inexpensive, and don’t require paint, glue, or drying time.
How do I keep friendship bracelet supplies organized?
Small compartment organizers work well for beads, charms, and other tiny supplies. Separate containers for embroidery floss can also prevent colors from becoming tangled.
Final Thoughts
Friendship bracelets are one of those crafts that are inexpensive to start but can keep children busy for a surprisingly long time.
Start with a simple diagonal stripe, learn the basic knot, and then experiment with beads, letters, charms, and different color combinations.
Once you’ve made one, you’ll probably find yourself wanting to try another pattern—and that’s where the fun really starts.
Save this guide for your next craft afternoon, sleepover, or kids’ party. 📌
Try PinCraft AI Free Today
Design beautiful Pinterest pins in seconds with AI. Start your free trial — no credit card needed.

Helping creators use AI tools and Pinterest to build digital product income from home.